
Lord Overhaul: How to fix a rake’s missing wing nut
Our rake lost its wing nut that is used to fix the pusher for the blades.

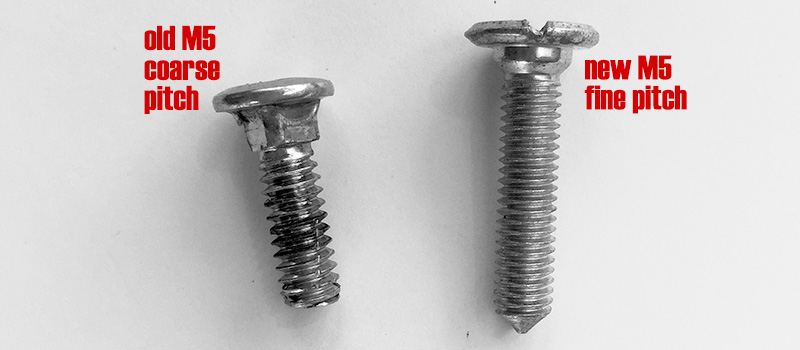
On first inspection I thought, that I just take any other M5 wing nut and that thing is good for another ten years of gardening service. But far wrong. The ISO metric screw threads (Wikipedia) come in different pitches: fine, middle, and coarse (at least in Germany). The thread in the rake must be either middle or coarse. At least none of my fine nuts fits on the thread.
So what now? Make or buy? Buy a couple of wing nuts? Buy a new rake? Of course not. Let’s replace the screw with a M5 fine pitched one.
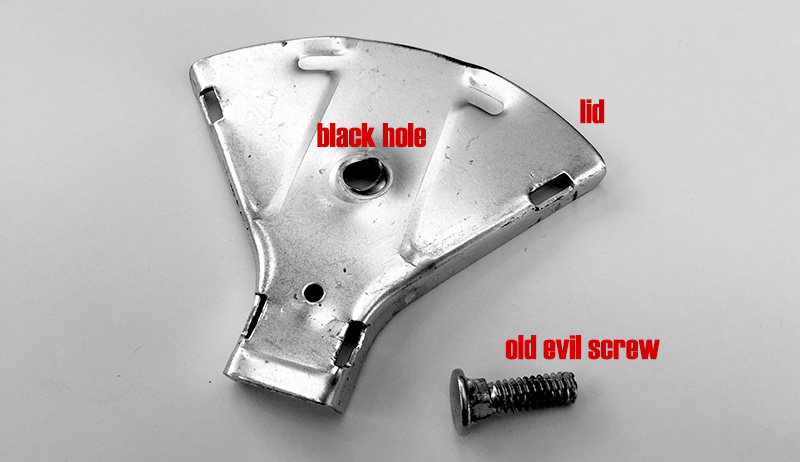
First step: Pry open the lid. Done. Second step: Remove the old screw. Not an easy task since the manufacturer first drilled a hole and then pushed or hammered the screw through the hole so it stuck really, really tight. After a couple of miserable attempts to remove it with pliers I realized that there is only one appropriate tool for this job: A hammer. The evil screw is out.
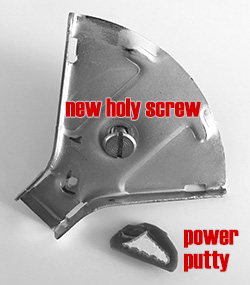
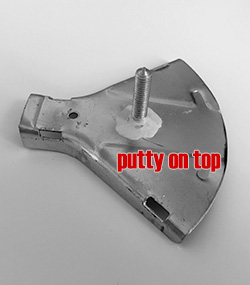
Let’s see how we get the new screw attached to the lid. Soldering stainless steel is difficult. Welding would surely work but is somewhat impossible without weldering equipment. Last resort: Glue! Hot glue, not durable enough. The same might apply to super glue. But two-component power putty should be fine.
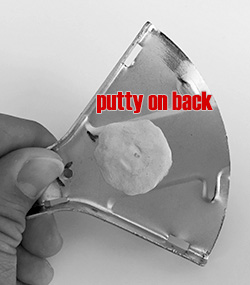
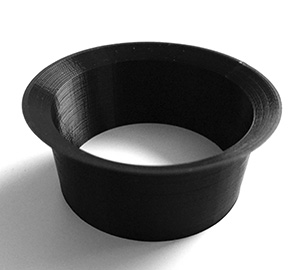
Funny thing: I do have nuts, but no wing nuts! Duh! So let’s print a wing nut using the awesome Ultimate Nut Knob Generator (Thingiverse) by wstein. Here it is.
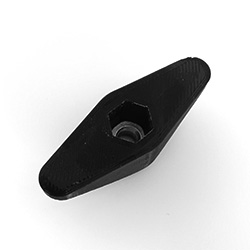
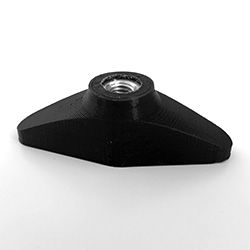
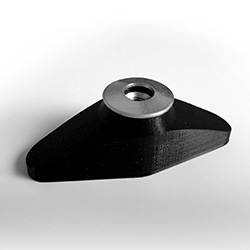
I super glued a washer on the outer side so the PLA will not be squashed or damaged when the wing nut is tightened. Now it’s time to put the pieces back together.
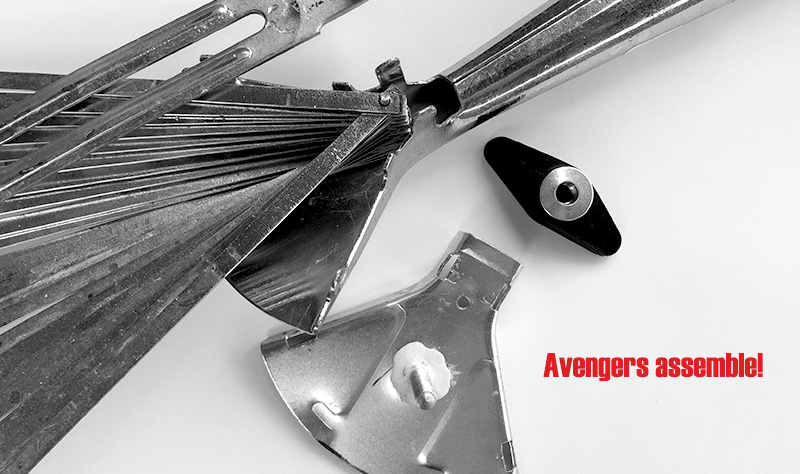
Avengers assemble!
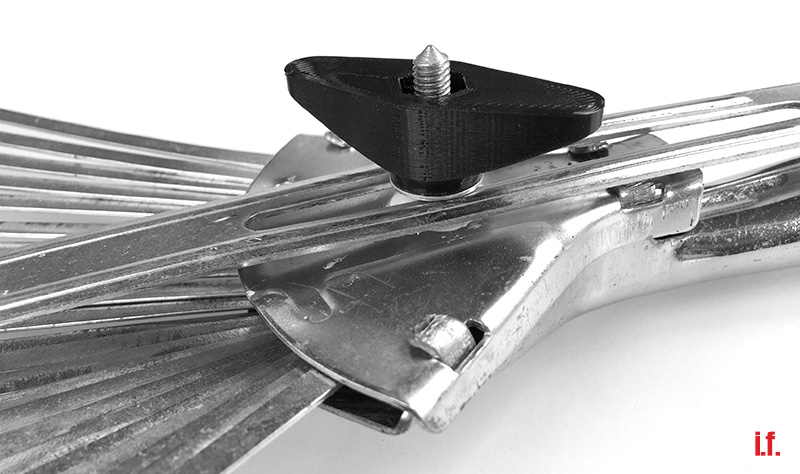
All set and done. Let the gardening begin!

Lord Overhaul: How to repair a coffee grinder’s broken bean hopper
 My coffee grinder’s outlet experienced some sort of non-graceful degradation due to 50% operating error and 50% faulty design: A screw that was intended to fix the bean hopper to the coffee grinder’s base crushed into the outlet and broke it. In the aftermath of this unhappy event pieces started to brake away from the bean hopper’s outlet impairing its functioning.
What now? A new bean hopper would cost about 20,- €. Pretty expensive, and, BTW, where is the fun in that? “Stay back boy! This calls for divine intervention! … I kick ass for the Lord!” – Father McGruder from Brain Dead, 1992. Time for Lord Overhaul’s sliding caliper, some CAD (Computer-Aided Design) Voodoo, and a 3D printer to make a spare funnel for the bean hopper!
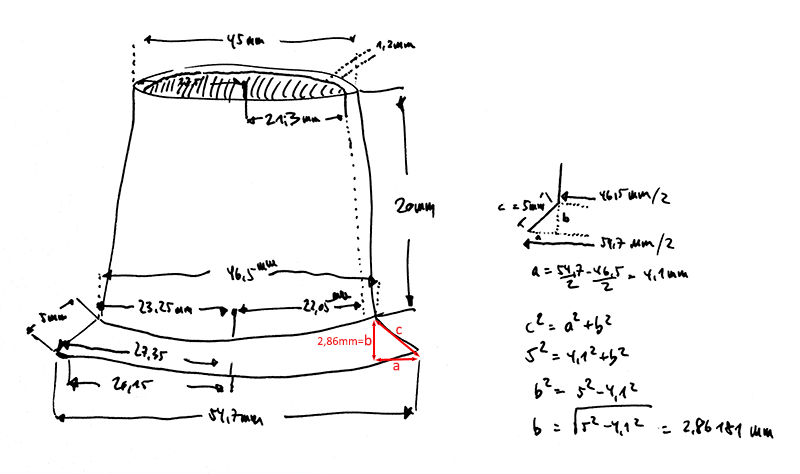
I use the caliper to measure a couple of things to get the dimensions of the funnel as exactly as possible. The most measurements are quit simple being either diameters or lengths. There is only one measurement that is a bit trickier: The correct slope of c is crucial for the funnel to neatly adapt to the bean hopper. The length of c can be measured easily, and a is the difference between the diameters of the outmost circle and the one beneath it. Since I can not measure the height b reliably, Pythagoras’ theorem comes to the rescue to calculate b. Confer the picture for an incredibly detailed and clearly arranged sketch. LOL
Now for the fun part: I need a 3-dimensional digital representation of the funnel and nearly immediately fail to design an according shape in SketchUp. A fool with a tool is still a fool! In other words: Non-sufficient skills in a) CAD and b) SketchUp. Back to school, YouTube is your friend. After viewing some SketchUp howto videos about funnel drawing I came across this one by Ivor O’Shea.
Ivor describes a method using an outline and the “follow me” tool. After some trial and error I could finally come up with an outline for the bean hopper funnel that looked like it could work.

Picture one shows the outline of my funnel with the dimensioning derived from the hand-drawn sketch (click picture to enlarge). I erased all snap lines drawn with the tape measure tool for clarity. Nonetheless, you definitely need snap lines for this method. In picture two you can see the “follow me” tool in action. The circle on the ground is only needed as a helper for the “follow me” tool and can be erased afterwards. By following the outline around the circle to a full 360° we get a complete funnel; cf. picture three.
 SketchUp exports to STL which is then loaded into the slicer who in turn produces the *.gcode file that is sent to the 3D printer. After only two failed 3D prints due to wrong slicer settings and issues with warping and elephant foot the third print was successful. A nice black funnel that looks like it could fit perfectly on the bottom of the bean hopper. But before the funnel can be attached the bean hopper needs some precision work: The mortal remains of the old funnel need to be removed.
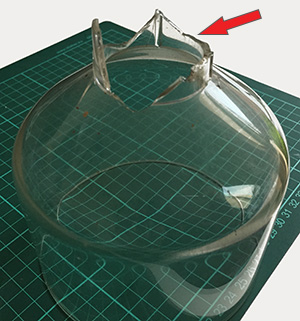
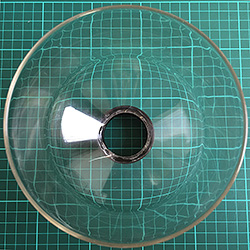
I first use a ripsaw to cut off the protruding parts of the old funnel from the bean hopper. Then I use a cutter blade to remove bumps and edges to get an even surface. Finally, I remove small ridges with sand paper.  There is nothing I can do about the cracks or the gap where a big chunk from the old funnel broke off; click the picture to enlarge, remains of the old funnel can be seen on the right. So, the bean hopper has been sufficiently primed to receive his new funnel!
Many tinkerers swear by either hot glue or superglue. So do I. With hot glue I would run the risk of filling up too much so I decide on superglue since I want the funnel to stick as tight as possible on the bean hopper. The 3D printed funnel fits perfectly and, with the amount of superglue used, will stick for all eternity. I carefully remove any excess superglue since I do not want superglue particles in my ground coffee and let the glued joint dry for some time before applying the repaired bean hopper to the coffee grinder.


Pushing and pulling the new funnel proves that superglue really lives up to its name. Let’s see if all the measuring was worth it!
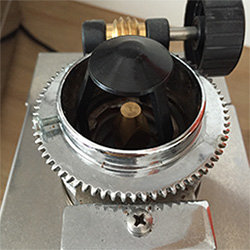
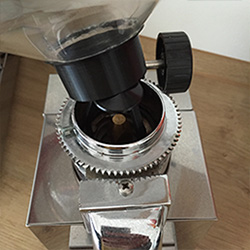
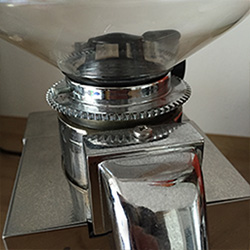
Oh, ah, Alpia. I love it when a plan comes together! The new funnel sits perfectly in the coffee grinder. Let the grinding begin!
i.f.